Getting a Room Ready For Drywall
 If your stripping a room with one by three Furring Strips for drywall, they are usually placed at sixteen inch centers. Also making sure the last one at the four foot mark is centered.
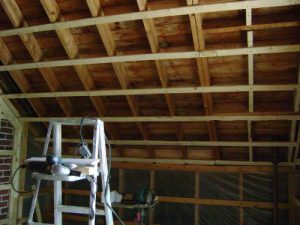
Sloped Ceilings
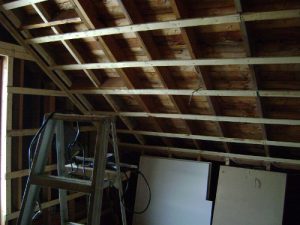 Many of the old farm houses will have sloped ceilings. If you wont to install a light in your ceiling, then just run a two by six across the center of the ceiling.
This then gives you a place to anchor your light box so it wont be sitting on an angle in the ceiling.
This also gives strong support if in the future a ceiling fan would be installed.
Closet Space
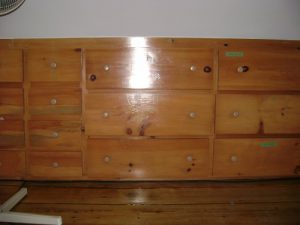 With the sloped ceilings in the room there is very little space to build a closet, so what I have done in this situation is at the three foot level on the slopes you can build either three levels of drawers, or put in shelves.
The drawer idea requires a lot of work to make, as it means making a frame work for the drawers where the drawer slides will run, and plywood for the drawers themselves with a face of pine or any type of wood you prefer.
Once finished will look great and give lots of room for storing clothes or anything else.
The shelf idea is quicker to make, just cut a piece of three quarter plywood, and fit it in at the height you wont. Or you can even go for drawers and shelves.
So at the same time that your doing the stripping you can take these things into account for what you wont to have for a closet space.
Electrical
Also as your doing the stripping you will wont to mark where you wont the electrical outlets in your room. Best to install the boxes for that, plus the wiring before the insulation is put in.
The electrical boxes are attaches with screws , and flush to where the drywall will be. The wiring is usually put through the two by sixes or two by fours that the walls were originally built with drilling holes through these for the wire to pass through.
A Brick Wall
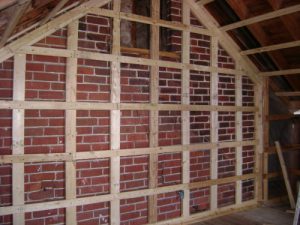 One wall in this bedroom was the original brick of the old farm house, so in order to strip over it you can nail a two by four unto the floor at the bottom.
Then at the ceiling another two by four is nailed to the rafters. In this case with the room being small the two by fours were nailed on there flat in order to give more room on the stairwell.
After the other two by fours are in place then the one by three furring strips are added every sixteen inches up the wall for the drywall.
Insulation
Once you have all the stripping put on and the electrical boxes for plugs in place then next would be your insulation.
Many people today are having the foam sprayed in, and it does give an excellent insulation and no air leaks.
Over the years I have seen when the fiberglass insulation is installed in walls and ceilings the mice and squirrels will tear it apart for there nest, leaving your walls and ceilings rather poorly insulated, just something to think about.
Windows
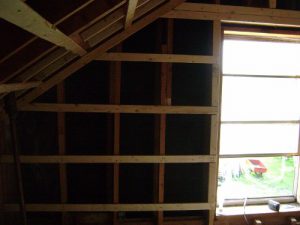 If you have any windows in the room be sure to add the furring strips all the way around the window, so it gives you a place to nail your window trim to.
Drywall Joints
Also when installing your drywall on a ceiling it is a good idea to put short pieces of the one by three furring strips between the sixteen inch strips where the joints in the drywall meet.
I have had to patch quite a few ceilings because of cracks showing up where the joints are and this is most often the cause.
Repairing Ceiling and Wall Cracks
If you ever have to repair any of these cracks that appear in the ceilings and walls just take a knife and cut a v where the crack is , then tape it and apply a coat of a product called Durabond 90 which prevents cracks from appearing again. It takes about an hour and a half to dry then smooth over with joint filler and a light sanding when dry and your ready for primer paint and a top coat.
I have also used the durabond to patch dog and cat scratches on the wood work beside doors, it seems to work really well for this also.
Tools
 For all the cutting of the furring strips and two by fours am still using a Makita circular saw seven and a quarter inch, as its one of those tools that just keeps on running. Highly recommended if your ever looking for a saw.
Furring Strips for Drywall Ideas
Well I hope this gives you a few ideas on installing the one by three furring strips before you get prepared to put the drywall on.
You can read also how to Paint a Tin Roof
Any comments just drop me a note
Wayne.