Playset
If anyone is interested in Building an Outdoor Playset then here is a few ideas to help you out. My son and I built this one this past summer for children to play on during the apple season. Is also best to use treated lumber for this project as it will be outside year round.
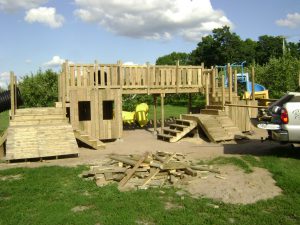
No Plans
This DIY playground has no plans , as the ideas just came out of my sons mind as we went along. So if your interested in building one take a good look at the photos, and there should be other plans on the internet for some of these.
Platforms
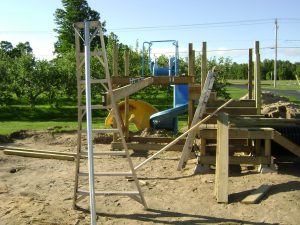
First thing to do is to build a couple platforms, and in this case they are six feet by six feet. Using the four by fours by eight feet long for the corners and two by sixes for around the base to square them up.
Cement Blocks
The four by four post are set onto the cement blocks that are designed for them. With the wider bases the blocks will not sink into the ground in time.
Platform Height
The platform will also have two by sixes at the six foot height so you can install a floor on them. Later the slides can be attached onto the floors giving good support to them.
The floors for these platforms are made from one by sixes and also are treated lumber, plus two by sixes spaced at two foot spacing to give support to the floor boards.
Squaring the Platforms
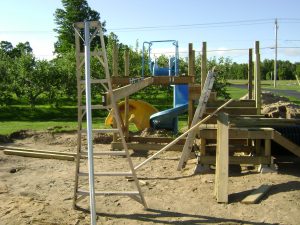
To keep everything square while building the platforms a few braces can be used, and attached to the four by fours to keep them level in both directions.
The Bridge
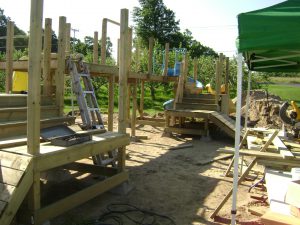
The second platform was spaced ten feet away from the first one, so a bridge could be built connecting the two together.
We used metal brackets designed to fasten the ten foot two by sixes to one platform and then to the other one.
Bridge Width
In the center of the ten foot span are also four by four post for support, and the bridge was spaced at a three foot in width and three ten foot two by sixes are used. Then the one by six boards were put on for the floor.
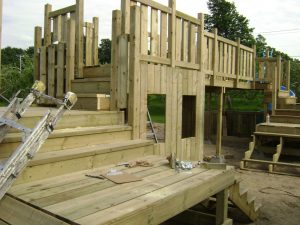
Building an Outdoor Playset Railings
Decking screws were used for the whole project, plus some bolts for the four by four bridge railing supports.
The four by four post to support the railing had the bolt holes drilled through them and through the ten foot two by sixes for extra strength. We used cordless drills for the project, a twenty volt Makita and a Dewalt, both worked very well.
The bridge post were four feet in length, with one at each end of the ten foot span, and two more at an equal distance in the middle. Then two by fours were attached top and bottom between the post with metal brackets, and leaving about a two inch space at the bottom.
The boards for the railing were spaced at two inches, but this can vary depending on codes in your area.
Play in the Railing
We found that after the railings were finished there was a small amount of movement at the top of the four by four post and railing. In order to fix this pieces of two by six were installed between each of the ten foot two by sixes and also at each post. After this was done there was very little to no play in the railings at the top.
Another Platform
The next thing you can build is another six foot by six foot platform with again the four by four post and two by sixes to square it up and the floor at a four foot height, with two by sixes spaced at two feet for the floor to be supported on. Then a stairs can be built from the bridge platform down to this one.
Slides
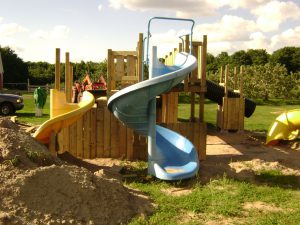
On this platform you can attach one of the DIY playground
slides which in this case is a three foot wide drainage plastic tile. With the groves on the outsides of the tile it is easy to anchor to the platform , by just installing a two by six across the top and bottom and one by five boards on the sides.
Slide Supports
At the bottom of the slide you can build another platform wide enough to support your slide about thirty eight or forty inches. Use the four by fours and two by sixes to create the frame work, then two by fours to lock in the slide at top and bottom. Have your slide about two feet off the ground
We added another slide from the six foot platform and enclosed it the same as the first one. Having more slope it was a little faster.
To The Ground
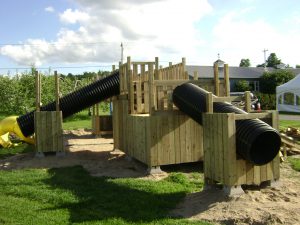
After this there is another platform built at a height of two feet with stairs made down to it, and then another set of stairs down to ground level.
The same was done to the first platform also, making two more platforms at a four foot and a two foot levels then also stairs to the ground.
Bottom Platforms
On the bottom platforms two sets of climbing stairs were made, Four two by sixes were used and ten there top boarded in solid.
On top of the boards one by three cleats were added and spaced two inches apart so children could climb up these, giving them the choice of stairs or ramps.
Forts For Children
Under the two bridge platforms the openings were boarded in then a couple windows made and a door into the six by six small room. This can create a playground fort for kids.
Sand
Another thing is after everything was constructed a good thick layer of sand was placed all around the structure. It covered the cement blocks that were used to support the four by four post.
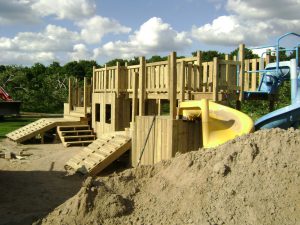
It also gives a soft landing under the slides so no danger of a child being hurt.
Tools
The tools used on this project were a Dewalt cut off saw, skillsaw, two drills eighteen volt a Dewalt and Makita very handy for all the screws we used.
Also a hammer and handsaw, shovel, and a few wrenches to tighten bolts used on the four by four post of the bridge and slides. If interested in any tools for these projects try your local hardware store.
Time
Now to construct this outdoor playset slide set it took the two of us a week, so if anyone is wanting to build this its not something you can do in a day.
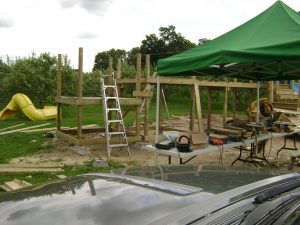
In some of the photos you will see a green canopy tent , this we put up to do our cutting under as the temperature was ninety to a hundred F. that week. Being Canadian takes us a while to get used to the heat.
Materials Used
Here is a list of materials used on this project.
Thirty – four by four post eight feet long.
Seventy- two by sixes eight feet long.
Hundred twenty- one by fives eight feet long.
Thirty four-cement blocks for the four by four post.
Sixteen- half inch bolts for four by fours on bridge.
Eight quarter inch bolts for anchoring slides.
Anyway hope you enjoyed reading about this playground design idea, if there are any questions about this leave me a comment and I will get back to you.
Wayne.
Wow, that is an amazing playset. Those are some lucky kids and my kids would be so jealous. It really looks like it’s built to last, too! Great idea.
Thanks Shannon, the playset does get a lot of use, especially in the fall as we built it near an apple stand.
Thanks for the comment.